Installieren von boot9strap (ntrboot)
Lesen erforderlich
Um die magnet-Links auf dieser Seite zu verwenden, benötigst du einen Torrent-Client, wie qBittorrent oder Deluge.
Was du brauchst
- A magnet that triggers the sleep mode of your console (if using a folding style console)
- Deine ntrboot geflashte Flashkarte
- Die neueste Version vom SafeB9SInstaller (Direkter Download)
- Die neueste Version von boot9strap (Direkter Download)
- Die neueste Version von Luma3DS (die Luma3DS
.zipDatei)
Anleitung
Schritt I - Vorbereitungen
- Power off your console
- Insert your console’s SD card into your computer
- Die SD-Karte deines 3DS, nicht die SD-Karte deiner Flashkarte
- Copy
SafeB9SInstaller.firmfrom the SafeB9SInstaller.zipto the root of your SD card and rename it toboot.firm- The root of the SD card refers to the initial directory on your SD card where you can see the Nintendo 3DS folder, but are not inside of it
- Copy
boot.3dsxfrom the Luma3DS.zipto the root of your console’s SD card - Create a folder named
boot9strapon the root of your console’s SD card -
Copy
boot9strap.firmandboot9strap.firm.shafrom the boot9strap.zipto the/boot9strap/folder on your console’s SD card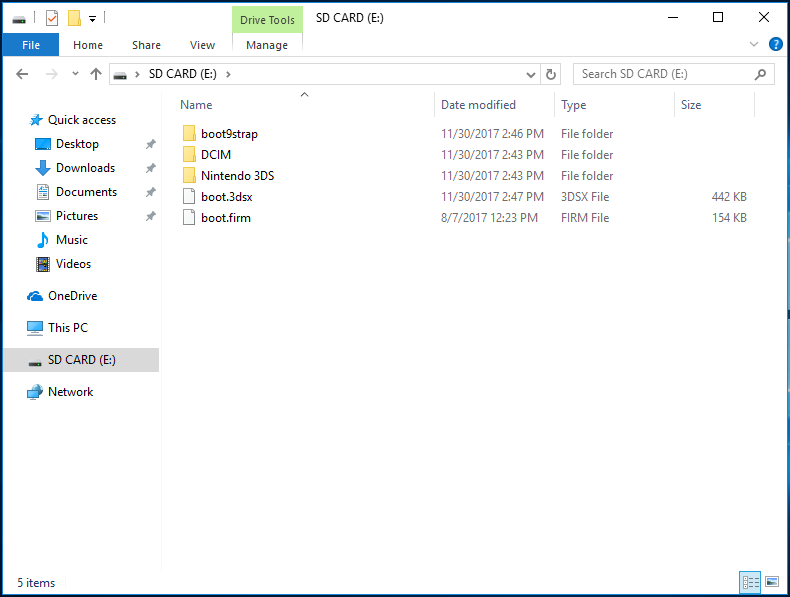
- Stecke deine SD-Karte wieder in deine Konsole
- Power on your console
Schritt II - ntrboot
- Use the magnet to find the spot on your console where the sleep sensor is triggered
- Dieser Schritt ist für den alten 2DS nicht notwendig (da dieser einen Schlafmodus-Schalter hat)
- Power off your console
- Insert your flashcart into your console
- Place the magnet on your console to trigger the sleep sensor
- Auf dem alten 2DS solltest du stattdessen den Schlafmodus-Schalter anmachen
- Halte (Start) + (Select) + (X) + (Powerknopf) für mehrere Sekunden gedrückt und lass sie danach wieder los
- Es kann ein paar Versuche brauchen bis das funktioniert, da die Positionierung ungünstig ist
- Wenn der Exploit erfolgreich war, wird SafeBS9Installer gestartet
- Remove the magnet from your console
- Auf dem alten 2DS solltest du stattdessen den Schlafmodus-Schalter ausmachen
Schritt III - boot9strap installieren
In this section, you will install custom firmware onto your console.
- Wenn du gebeten wirst, eine Tastenkombination einzugeben, gib die Tastenkombination auf dem oberen Bildschirm ein, um boot9strap zu installieren
- If a step on the lower screen has red-colored text, and you are not prompted to input a key combo, follow this troubleshooting guide
- Once it is completed, force your console to power off by holding down the power button
- Your console will only boot to the SafeB9SInstaller screen until the next section is completed
Schritt IV - Luma3DS konfigurieren
- Insert your console’s SD card into your computer
- Lösche
boot.firmaus dem Stammverzeichnis deiner SD-Karte - Copy
boot.firmfrom the Luma3DS.zipto the root of your SD card - Stecke deine SD-Karte wieder in deine Konsole
- Power on your console
- Deine Konsole sollte in das Luma3DS Konfigurations-Menü gestartet haben
- Das Luma3DS Konfigurations-Menü enthält Einstellungen für die Luma3DS Custom Firmware. Viele dieser Einstellungen können nützlich für Personalisierung oder Debugging sein
- Für den Zweck dieser Anleitung lasse alle Optionen auf ihren Standardeinstellungen (aktiviere oder deaktiviere nichts)
- Wenn sich deine Konsole beim Starten direkt wieder ausschaltet, solltest du sicherstellen, dass du
boot.firmaus der Luma3DSzipDatei in das Stammverzeichnis deiner SD-Karte kopiert hast
- Drücke (Start) um zu Speichern und neu zu starten
Ab diesem Punkt wird deine Konsole standardmäßig Luma3DS starten.
- Luma3DS sieht nicht anders aus als das normale HOME-Menü. Wenn deine Konsole in das HOME-Menü gestartet ist, läuft Custom Firmware auf ihr.
- Auf der nächsten Seite wirst du nützliche Homebrew Apps installieren, um die Installation abzuschließen.
Fortfahren mit Setup fertigstellen
Das Folgende ist optional und erlaubt es dir, deine Flashkarte in den Ursprungszustand zu versetzen (für das Verwenden ihrer Standardfunktionen).
Beachte, dass die Acekard 2i ihre Fähigkeit behält, .nds-Dateien zu starten, selbst während der ntrboot-Exploit installiert ist. Dies gilt nur, wenn die Acekard 2i in einem NDS oder einem 3DS mit Custom Firmware ist! Während der ntrboot-Exploit auf der Acekard 2i installiert ist, kann diese keine .nds-Dateien auf DSi oder unmodifizierten 3DS-Konsolen starten.
Folge diesen Schritten erst, wenn du den Rest der Anweisungen auf dieser Seite abgeschlossen hast.
Schritt V - ntrboot entfernen
Was du brauchst
- The latest release of ntrboot_flasher (
ntrboot_flasher.firm) - Die Flashrom-Sicherung deiner entsprechenden Flashkarte
- Note that if you followed Flashing ntrboot (3DS Multi System), the flashrom backup already exists in the correct location and does not need to be downloaded
- Note that if you followed Flashing ntrboot (3DS Single System) or Flashing ntrboot (NDS), the flashrom backup already exists on your flashcart’s SD card and should be copied to the location specified below Wenn du deine HW revision nicht weißt, probiere einfach alle für deine Karte aus. Only the correct one will allow your flashcart to launch properly from the HOME Menu, but flashing the wrong one will not brick the cart
| Flashkarte | Hardware Revision | Flashrom |
|---|---|---|
| Ace3DS X | N/A | |
| Acekard 2i | HW 81 | - Acekard_2i_(HW_81)-Flashrom.zip |
| Acekard 2i | HW 44 | - Acekard_2i_(HW_44)-Flashrom.zip |
| DSTT | Fehlt | |
| Infinity 3 R4i | HW A5 | - R4i_Gold_3DS_(HW_A5)-Flashrom.zip |
| R4 3D Revolution | HW A6 | - R4i_Gold_3DS_(HW_A6)-Flashrom.zip |
| R4i Gold 3DS Deluxe “Starter” | Fehlt | |
| R4i Gold 3DS | HW 4 | - R4i_Gold_3DS_(HW_4)-Flashrom.zip |
| R4i Gold 3DS | HW 5 | Fehlt |
| R4i Gold 3DS | HW 6 | Fehlt |
| R4i Gold 3DS | HW 7 | Fehlt |
| R4i Gold 3DS | HW 8 | - R4i_Gold_3DS_(HW_8)-Flashrom.zip |
| R4i Gold 3DS | HW D | - R4i_Gold_3DS_(HW_D)-Flashrom.zip |
| R4i Gold 3DS Plus | Fehlt | |
| R4i Gold 3DS RTS | HW A5 | - R4i_Gold_3DS_(HW_A5)-Flashrom.zip |
| R4i Gold 3DS RTS | HW A6 | - R4i_Gold_3DS_(HW_A6)-Flashrom.zip |
| R4i Gold 3DS RTS | HW A7 | - R4i_Gold_3DS_(HW_A7)-Flashrom.zip |
| R4i Ultra | - R4i_Ultra-Flashrom.zip | |
| R4i-SDHC 3DS RTS | - R4i-SDHC_3DS_RTS_B9S-Flashrom.zip | |
| R4i-SDHC B9S | - R4i-SDHC_3DS_RTS_B9S-Flashrom.zip | |
| R4iSDHC GOLD Pro 20XX from r4isdhc .com | - R4iSDHC.com_20XX-Flashrom.zip | |
| R4iSDHC RTS LITE 20XX from r4isdhc .com | - R4iSDHC.com_20XX-Flashrom.zip | |
| R4iSDHC Dual-Core 20XX from r4isdhc .com | - R4iSDHC.com_20XX-Flashrom.zip |
Anleitung
- Power off your console
- Stecke deine SD-Karte in deinen Computer
- Die SD-Karte deines 3DS, nicht die SD-Karte deiner Flashkarte
- Erstelle einen Ordner mit dem Namen
ntrbootim Stammverzeichnis deiner SD-Karte - Kopiere die
.bin-Datei von deiner Flashrom-Backup.zipin den Ordner/ntrboot/auf dem Stammverzeichnis der SD-Karte - Erstelle einen Ordner mit dem Namen
payloadsimluma-Ordner auf deiner SD-Karte - Kopiere
ntrboot_flasher.firmin den/luma/payloadsOrdner der SD-Karte - Stecke deine SD-Karte wieder in deine Konsole
- Insert your ntrboot compatible DS / DSi flashcart into your console
- Starte ntrboot_flasher, indem du während dem Starten deiner Konsole die Taste (Start) gedrückt hältst
- Lies die Warnung auf dem roten Bildschirm
- Drücke (A), um fortzufahren
- Wähle deine Flashcart aus
- Wenn du deine Flashkarte in der Liste oben nicht siehst, lies den unteren Bildschirm für mehr Informationen zu jeder Option
- Wähle “Restore Flash”
- Drücke (A), um fortzufahren
- Warte, bis der Prozess beendet ist
- Drücke (A), um zum Hauptmenü zurückzukehren
- Press (B) to power off your console