安装boot9strap (通过 ntrboot)
如果有疑问并且懂英语的话,可以到 Nintendo Homebrew Discord 服务器上使用英文寻求帮助。(请注意,如果你身处中国大陆,你可能需要通过科学上网来访问 Discord)
你也可以到译者的 QQ 群寻求帮助,群号为 942052497。
如果你喜欢我们的教程,可以通过捐赠支持我们。
重要事项
你需要一个支持 BT 协议的下载程序,如 qBittorrent 或 Deluge 来下载本教程中的磁力链接 。
你需要准备点啥?
- A magnet that triggers the sleep mode of your console (if using a folding style console)
- 一张已经写入 ntrboot 漏洞的烧录卡
- 最新版本的 SafeB9SInstaller(直链)
- 最新版本的 boot9strap(直链)
- 最新版本的 Luma3DS(下载 Luma3DS
.zip文件)
操作步骤
第一步 – 准备工作
- 将主机关机
- 将你主机的 SD 卡插入你的电脑
- 这里指的是 3DS 的 SD 卡,不是烧录卡中的 SD 卡
- 将 SafeB9SInstaller
.zip中的SafeB9SInstaller.firm复制到 SD 卡的根目录下,然后重命名为boot.firm- 根目录指的是你点进 SD 卡看到的目录,你可以在这个目录下看到 Nintendo 3DS 文件夹,但请不要点进去
- 解压 Luma3DS
.zip里的boot.3dsx到你主机 SD 卡的根目录 - 在你主机 SD 卡根目录创建一个名为
boot9strap的文件夹 -
从boot9strap
.zip压缩包中复制boot9strap.firm和boot9strap.firm.sha到你主机 SD 卡的/boot9strap/文件夹中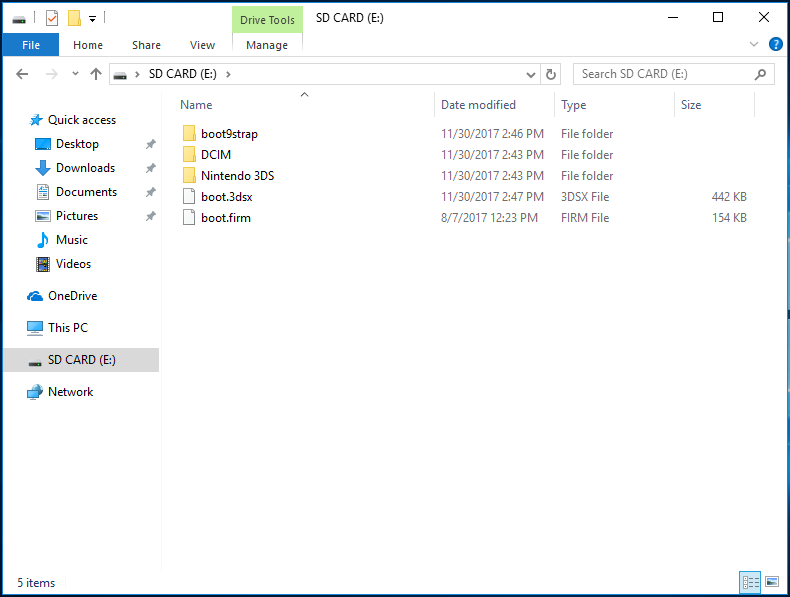
- Reinsert your SD card into your console
- Power on your console
第二步 – 触发 ntrboot
- Use the magnet to find the spot on your console where the sleep sensor is triggered
- 老型号的 2DS 可以跳过此步(因为其有独立的休眠开关)
- 将主机关机
- Insert your flashcart into your console
- Place the magnet on your console to trigger the sleep sensor
- 老型号的 2DS 将休眠模式开关打开即可
- 按住 “Start” + “Select” + “X” + “电源键” 几秒钟,然后放开
- 你可能要多试几次,因为这些组合键有点难按
- 如果一切成功的话,你将自动进入 SafeB9SInstaller
- Remove the magnet from your console
- 老型号的 2DS 将休眠模式开关关闭即可
第三步 – 安装 boot9strap
In this section, you will install custom firmware onto your console.
- When prompted, input the key combo given on the top screen to install boot9strap
- If a step on the lower screen has red-colored text, and you are not prompted to input a key combo, follow this troubleshooting guide
- Once it is completed, force your console to power off by holding down the power button
- Your console will only boot to the SafeB9SInstaller screen until the next section is completed
第四步 – 设置 Luma3DS
- 将你主机的 SD 卡插入你的电脑
- 删除 SD 卡根目录下的
boot.firm文件 - 解压 Luma3DS
.zip里的boot.firm到你 SD 卡的根目录 - Reinsert your SD card into your console
- Power on your console
- 你的主机应该会在开机后进入 Luma3DS 配置菜单
- Luma3DS 配置菜单用于设置 Luma3DS 自制固件的可选功能 其中有许多功能可用于个性化或调试
- 对于本手册的目的而言,请不要修改默认设置(不要选中或者取消选中任何东西)
- 如果你的主机在你尝试开机后直接自动关机了,请确认你已经从 Luma3DS
.zip中复制了boot.firm文件到你的 SD 卡根目录中
- 按下 “Start” 键保存设置并重启
At this point, your console will boot to Luma3DS by default.
- Luma3DS does not look any different from the normal HOME Menu. If your console has booted into the HOME Menu, it is running custom firmware.
- On the next page, you will install useful homebrew applications to complete your setup.
继续至完成安装
以下是一个恢复烧录卡的可选章节(这样可以使你烧录卡能够正常使用)
请注意,Acekard 2i 烧录卡在被写入 ntrboot 漏洞后,仍然能够正常使用并启动 .nds 文件。 不过,这只适用于 NDS 或者破解了某种破解的 3DS! 在写入 ntrboot 漏洞到 Acekard 2i 烧录卡后,它将无法在 DSi 或未破解的 3DS 上使用并运行 .nds 文件
请不要在完成以上章节之前进行下面的操作。
第五步 – 移除 ntrboot
你需要准备点啥?
- 最新版本的 ntrboot_flasher(
ntrboot_flasher.firm) - 对应你烧录卡的备份
- 请注意,如果你之前是按照写入 ntrboot(通过多台 3DS)做的,那么烧录卡备份已经存在于你的内存卡的正确位置,你不需要再次下载下面给出的备份文件
- 请注意,如果你之前是按照 写入 ntrboot(通过单台 3DS)或写入ntrboot(通过 NDS)做的,那么烧录卡备份已经存在于你烧录卡的 SD 卡,请按照下面的提示复制到对应位置
- 如果你不知道 HW revision 编码是多少,那么你可以每个都试一试。 只有正确的版本才可以在主菜单中启动烧录卡,刷入错误的版本不会导致烧录卡损坏
| 烧录卡 | 硬件版本 | 备份 |
|---|---|---|
| Ace3DS X | N/A | |
| Acekard 2i | HW 81 | - Acekard_2i_(HW_81)-Flashrom.zip |
| Acekard 2i | HW 44 | - Acekard_2i_(HW_44)-Flashrom.zip |
| DSTT | 未知 | |
| Infinity 3 R4i | HW A5 | - R4i_Gold_3DS_(HW_A5)-Flashrom.zip |
| R4 3D Revolution | HW A6 | - R4i_Gold_3DS_(HW_A6)-Flashrom.zip |
| R4i Gold 3DS Deluxe “Starter” | 未知 | |
| R4i Gold 3DS | HW 4 | - R4i_Gold_3DS_(HW_4)-Flashrom.zip |
| R4i Gold 3DS | HW 5 | 未知 |
| R4i Gold 3DS | HW 6 | 未知 |
| R4i Gold 3DS | HW 7 | 未知 |
| R4i Gold 3DS | HW 8 | - R4i_Gold_3DS_(HW_8)-Flashrom.zip |
| R4i Gold 3DS | HW D | - R4i_Gold_3DS_(HW_D)-Flashrom.zip |
| R4i Gold 3DS Plus | N/A | |
| R4i Gold 3DS RTS | HW A5 | - R4i_Gold_3DS_(HW_A5)-Flashrom.zip |
| R4i Gold 3DS RTS | HW A6 | - R4i_Gold_3DS_(HW_A6)-Flashrom.zip |
| R4i Gold 3DS RTS | HW A7 | - R4i_Gold_3DS_(HW_A7)-Flashrom.zip |
| R4i Ultra | - R4i_Ultra-Flashrom.zip | |
| R4i-SDHC 3DS RTS | - R4i-SDHC_3DS_RTS_B9S-Flashrom.zip | |
| R4i-SDHC B9S | - R4i-SDHC_3DS_RTS_B9S-Flashrom.zip | |
| 来自于 r4isdhc .com 的 R4iSDHC GOLD Pro 20XX | - R4iSDHC.com_20XX-Flashrom.zip | |
| 来自于 r4isdhc .com 的 R4iSDHC RTS LITE 20XX | - R4iSDHC.com_20XX-Flashrom.zip | |
| 来自于 r4isdhc .com 的 R4iSDHC Dual-Core 20XX | - R4iSDHC.com_20XX-Flashrom.zip |
操作步骤
- 将主机关机
- 将你的 SD 卡插入到电脑
- 这里指的是 3DS 的 SD 卡,不是烧录卡中的 SD 卡
- 在 SD 卡根目录创建一个名为
ntrboot的文件夹 - 从烧录卡备份
.zip压缩包中复制.bin文件到你的 SD 卡的/ntrboot/文件夹 - 在SD卡的
luma文件夹里创建payloads文件夹 - 复制
ntrboot_flasher.firm到 SD 卡的/luma/payloads/文件夹中 - Reinsert your SD card into your console
- Insert your ntrboot compatible DS / DSi flashcart into your console
- 开机时按住 “Start” 键启动 ntrboot_flasher
- 请仔细阅读警告信息
- 按 “A” 键继续
- 选择对应你的烧录卡
- 如果你在上屏列表中没有看到你的烧录卡,请阅读下屏以获取每个选项的更多信息
- 选择 “Restore Flash”
- 按 “A” 键继续
- 等待测试完成
- 按 “A” 键返回主菜单
- Press (B) to power off your console